Complete guide to the visual website editor — from installation to publishing your site.
secms-GUI.AppImage file.chmod +x secms-GUI.AppImage./secms-GUI.AppImage💡 Tip: On some Linux systems (especially with Korean, Japanese, or Chinese input methods), you may need to launch with environment variables for proper IME support. A launcher script
run-appimage.shis provided that sets these automatically.
.zip file for macOS..exe installer for Windows.If you have Go and Node.js installed:
# Run as a desktop app
./run.sh

# Or run the web interface only (opens in your browser)
task devWhen you first open seCMS GUI, you'll see the landing page:

If this is your first time, click "+ New Site" to get started.
The editor uses a three-pane layout:
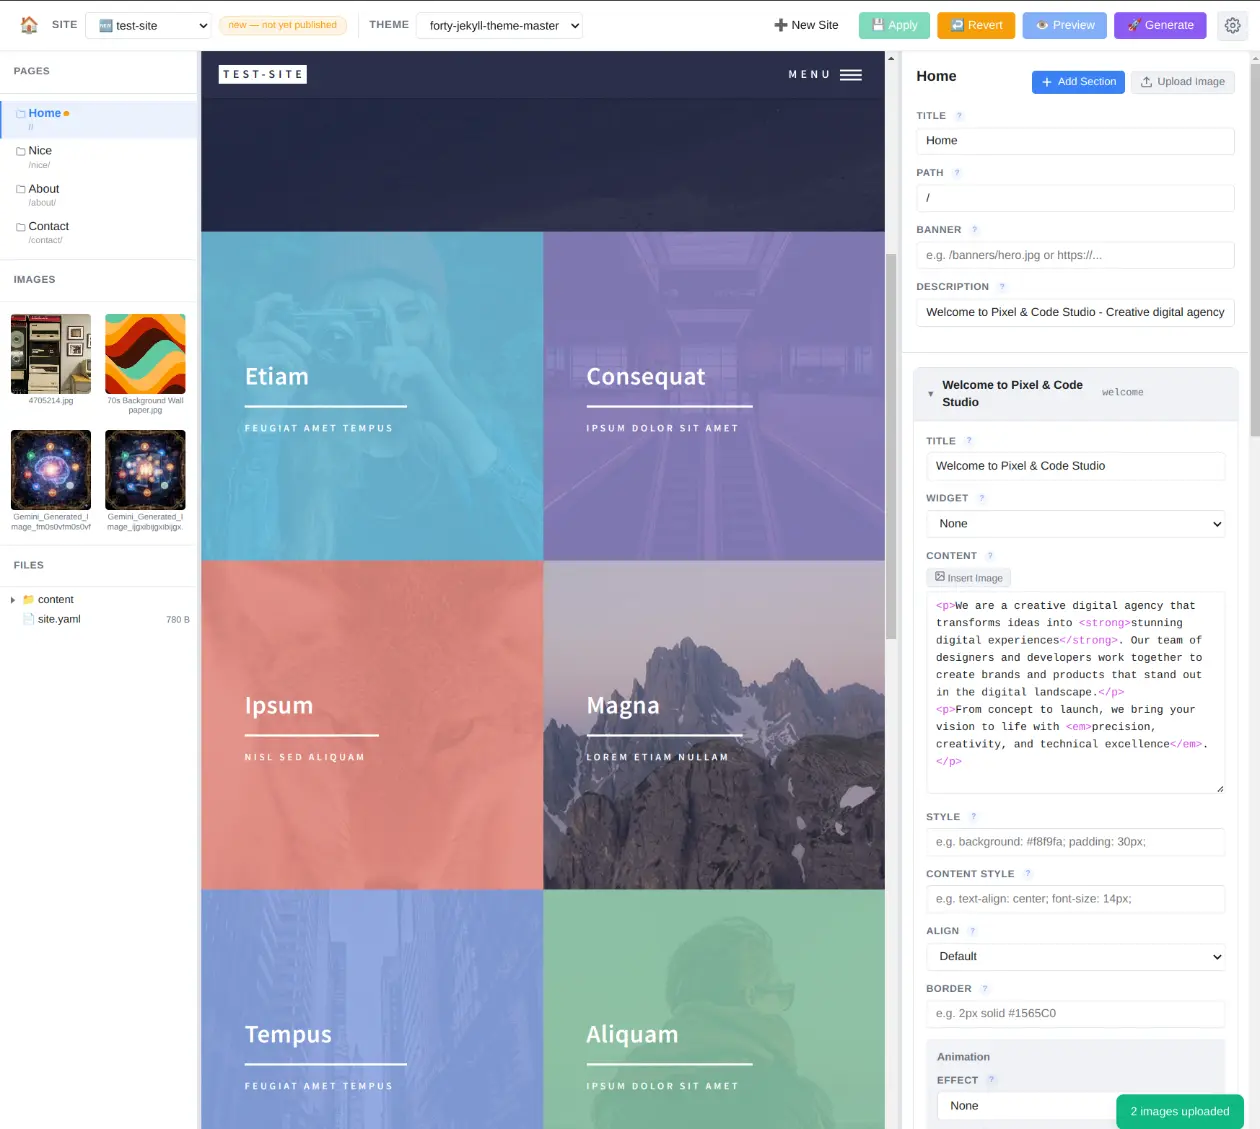
Shows a live preview of your website. After making edits, click Preview to see the updated version.
This is where you edit your content. It shows:
You can resize the panes by dragging the dividers between them.
Click any page name in the Pages list (left pane) to load it in the editor.
At the top of the right pane, you'll see the page-level fields:
| Field | What it does |
|---|---|
| Title | The page heading shown on the site |
| Path | The URL path (e.g., /about or /services/design) |
| Description | Used by search engines (SEO meta description) |
| Banner | Path to a banner image for the page |
⚠️ Note: Deleting a page removes it permanently. Make sure you've saved any content you want to keep.
Pages are made up of sections — blocks of content that appear one after another on the page. Each section can have its own title, content, styling, and special features.
| Field | What it does |
|---|---|
| Title | Section heading displayed on the page |
| Widget | Special interactive component (e.g., contact-form) |
| Content | The main text/HTML content of the section |
| Style | CSS styling for the section container |
| Content Style | CSS styling for the inner content |
| Align | Text alignment: Default, Left, Center, or Right |
| Border | CSS border (e.g., 2px solid #1565C0) |
| Image | Path to a decorative image |
| Animation | Animated effects for the section |
The Content field accepts HTML. You can use:
<p> for paragraphs<strong> for bold text<em> for italic text<a href="..."> for links<img src="..."> for images<ul> and <ol> for listsExample:
<p>Welcome to our website! We specialize in <strong>web design</strong>
and <em>digital marketing</em>.</p>

<p>Contact us at <a href="mailto:hello@example.com">hello@example.com</a>.</p>Click the "+ Add Section" button at the bottom of the section list. A new empty section is added at the end of the page.
Use the up/down arrow buttons on each section card to move it higher or lower on the page.
Click the trash icon on the section card header. Confirm the deletion.
Some themes support animated effects on sections. In the Animation area:
Method 1 — Insert from gallery: While editing a section's Content field, place your cursor where you want the image. Then click the "Insert Image" button above the content area. Select an image from the gallery to insert it.
Method 2 — Manual HTML: Type an image tag directly in the content field:
<img src="/images/photo.jpg" alt="Description of the image">| Class | Effect |
|---|---|
float-left | Image floats to the left, text wraps around it |
float-right | Image floats to the right, text wraps around it |
center | Image is centered on the page |
full-width | Image stretches to fill the full width |
The navigation menu appears at the top of your website (in most themes) and lets visitors navigate between pages.
To add a link to an external website (e.g., your blog or social media), set the URL instead of a path and mark it as External so it opens in a new browser tab.
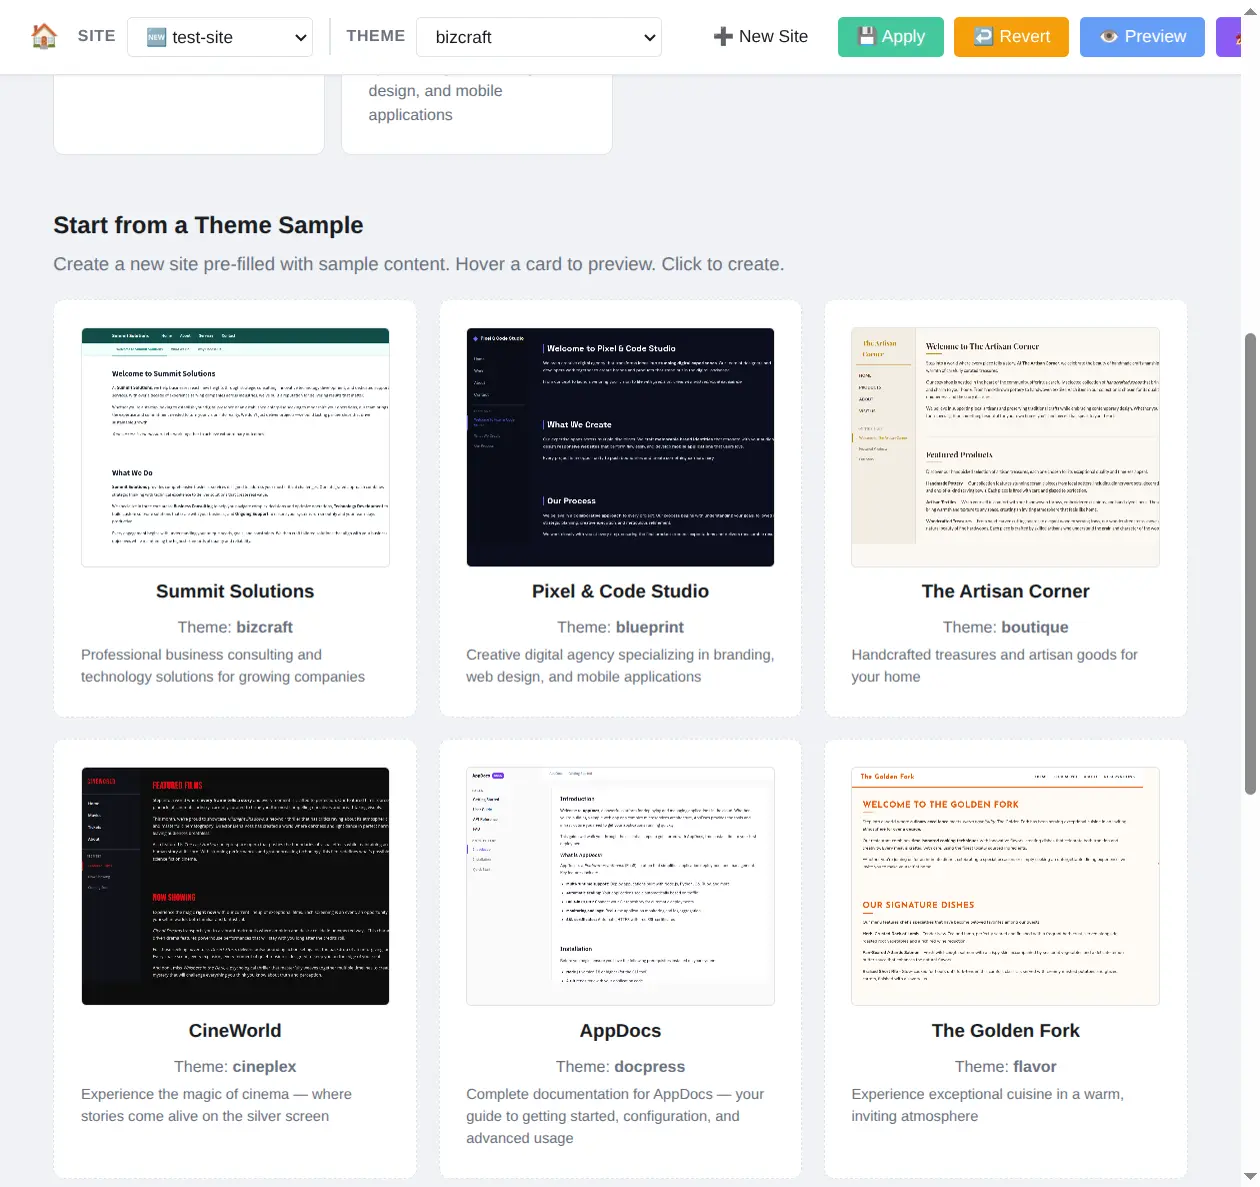
Themes control the visual design of your website — colors, fonts, layout, and style.
| Theme | Best for |
|---|---|
| starter | Simple starting point, easy to customize |
| blueprint | Clean, professional business sites |
| bizcraft | Corporate and business websites |
| boutique | Creative portfolios and shops |
| cineplex | Entertainment and media sites |
| docpress | Documentation and knowledge bases |
| flavor | Restaurants and food businesses |
| photofocus | Photography portfolios |
| runable | Modern app and startup sites |
| techcatalog | Technology product showcases |
💡 Tip: Changing the theme does not affect your content — only the visual design changes. You can switch themes at any time.
Preview builds your site from your current edits (even unsaved ones) and shows the result in the middle pane.
The preview is a fully functional version of your site. You can scroll through it, click links, and see exactly how it will look to visitors.
Generate creates the final version of your site from your saved content.
The generated files are placed in your site's dist/ directory. These are the files you'd upload to your web hosting provider.
⚠️ Important: Preview uses your unsaved edits. Generate uses your saved content. Always Apply before Generate to include your latest changes.
seCMS GUI uses a workspace system to protect your published site:
Click the Apply button to save all your changes. The button pulses green when you have unsaved changes.
Click the Revert button to discard all unsaved changes and go back to the last saved version. A confirmation dialog will appear.
⚠️ Note: Revert cannot be undone. Make sure you want to discard your changes before confirming.
Click the gear icon in the top-right corner of the menu bar to open Settings.
| Setting | What it does |
|---|---|
| Sites Directory | Where your website files are stored |
| Themes Directory | Where themes are located |
| secms Binary | Path to the secms build tool |
| Workspace Directory | Where temporary editing copies are kept |
| Port | The local server port (default: 9090) |
Most users won't need to change these settings. They're pre-configured when you install the app.
| Shortcut | Action |
|---|---|
| Ctrl+S | Save (Apply changes) |
| Ctrl+P | Preview |
| Ctrl+Shift+P | Generate (Publish) |
| Escape | Close dialogs |
/about, /services, /contact).This message appears in the preview when the page hasn't been built yet. Click the Preview button to build and display your content.
If the preview seems stuck, try:
/images/ (e.g., /images/photo.jpg).Make sure you clicked Apply (Save) before Generate. Generate uses saved content, not your current edits.
chmod +x secms-GUI.AppImage).